
이번 글에서는 사용자에게 정보를 받은 정보로 헤더와 소개 페이지를 만들어 보겠습니다.
헤더 만들기
헤더 정보 받기
헤더를 만들기 위해서는 사용자에게 헤더에 들어갈 내용을 받아야 합니다. 블로그 이름, 깃허브 주소등 헤더에 넣고 싶은 내용을 받을 수 있습니다.
우리는 이전 글에서 author 디렉터리와 파일을 만들어 사용자에게 댓글 주소를 받았습니다. 만들었던 author 파일에 헤더에 들어갈 값을 추가로 넣어 주겠습니다.
저는 블로그 제목, 깃허브 주소 그리고 로고 이미지 주소값을 넣었습니다.
+++
disqus = 'https://bohyeon.disqus.com/embed.js'
title = '구보현 블로그'
github = 'https://github.com/bohyeon-n'
logo='https://d29fhpw069ctt2.cloudfront.net/icon/image/85053/preview.svg'
+++
author 파일 읽어오기
사용자 정보를 받았으면, 받은 정보를 잘 가져올 수 있는지 확인해봅시다. 이전에 작성해 두었던 author.md 파일을 읽어 사용자 값을 가져오는 코드를 다시 살펴봅시다.
// author.md 파일 읽기
const authorFile = fs.readFileSync("./author/author.md", "utf8");

// 사용자 값 읽기
const authorValue = extractValue(authorFile);
console.log(authorValue);
node hello-node.js 를 실행하면 입력한 값을 잘 가져오는 것을 확인할 수 있습니다.
{ disqus: 'https://bohyeon.disqus.com/embed.js',
  title: '구보현 블로그',
  github: 'https://github.com/bohyeon-n',
  logo:
   'https://d29fhpw069ctt2.cloudfront.net/icon/image/85053/preview.svg' }
헤더 템플릿 만들기
이제 우리가 받은 사용자 정보를 넣어 줄 헤더 템플릿을 만들어야 합니다. templates 디렉토리에 header_format.html 파일을 만들어 주세요.
그리고 사용자에게 받은 값을 넣을 수 있도록 템플릿 태그를 작성합니다. 저는 로고 이미지, 블로그 제목, github, home 그리고 뒤에서 만들 소개 페이지의 메뉴도 추가하였습니다.
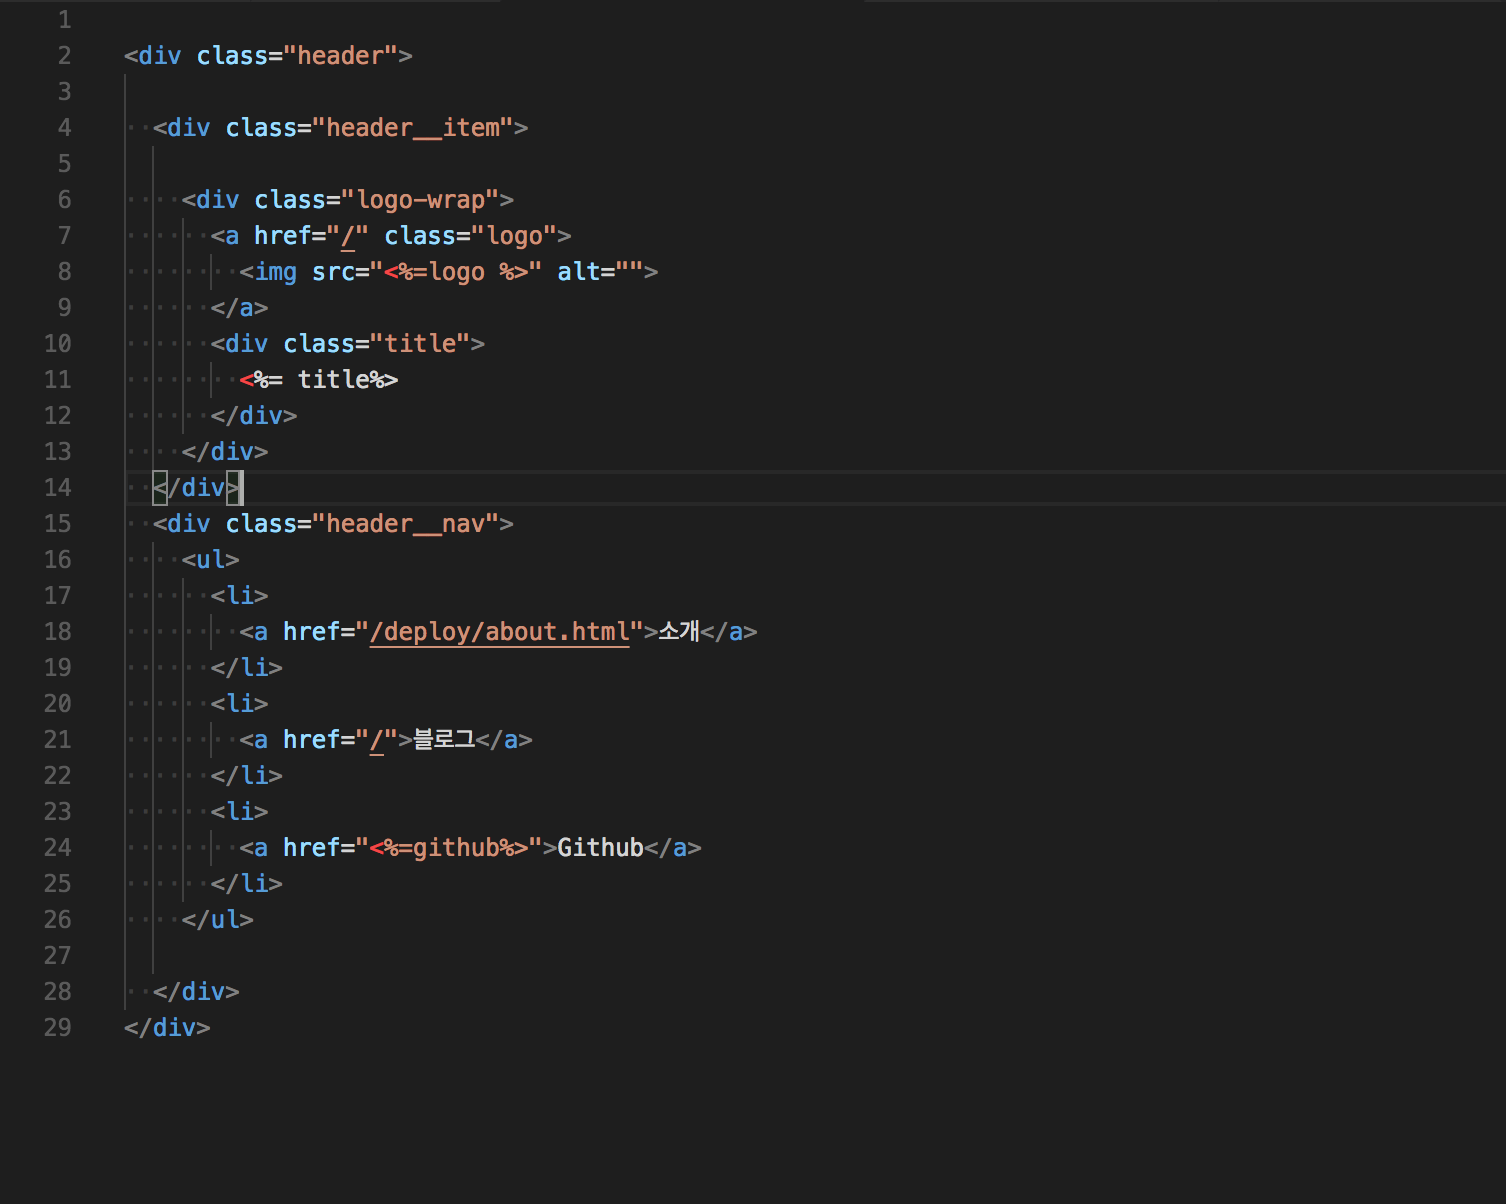
헤더 템플릿을 완성 후 layout_format.html 에 헤더 템플릿이 들어갈 자리를 만들어주세요.
템플릿에 사용자 값 넣기
이제 작성한 템플릿에 값을 넣어주는 작업을 해보겠습니다.
먼저 header_format.html 파일을 읽어옵니다.
const authorHtmlFormat = fs.readFileSync(
  "./templates/header_format.html",
  "utf8"
);
헤더 템플릿에 사용자의 값을 채워줍니다.
const header = ejs.render(HeaderHtmlFormat, {
  logo: authorValue.logo,
  title: authorValue.title,
  github: authorValue.github
});
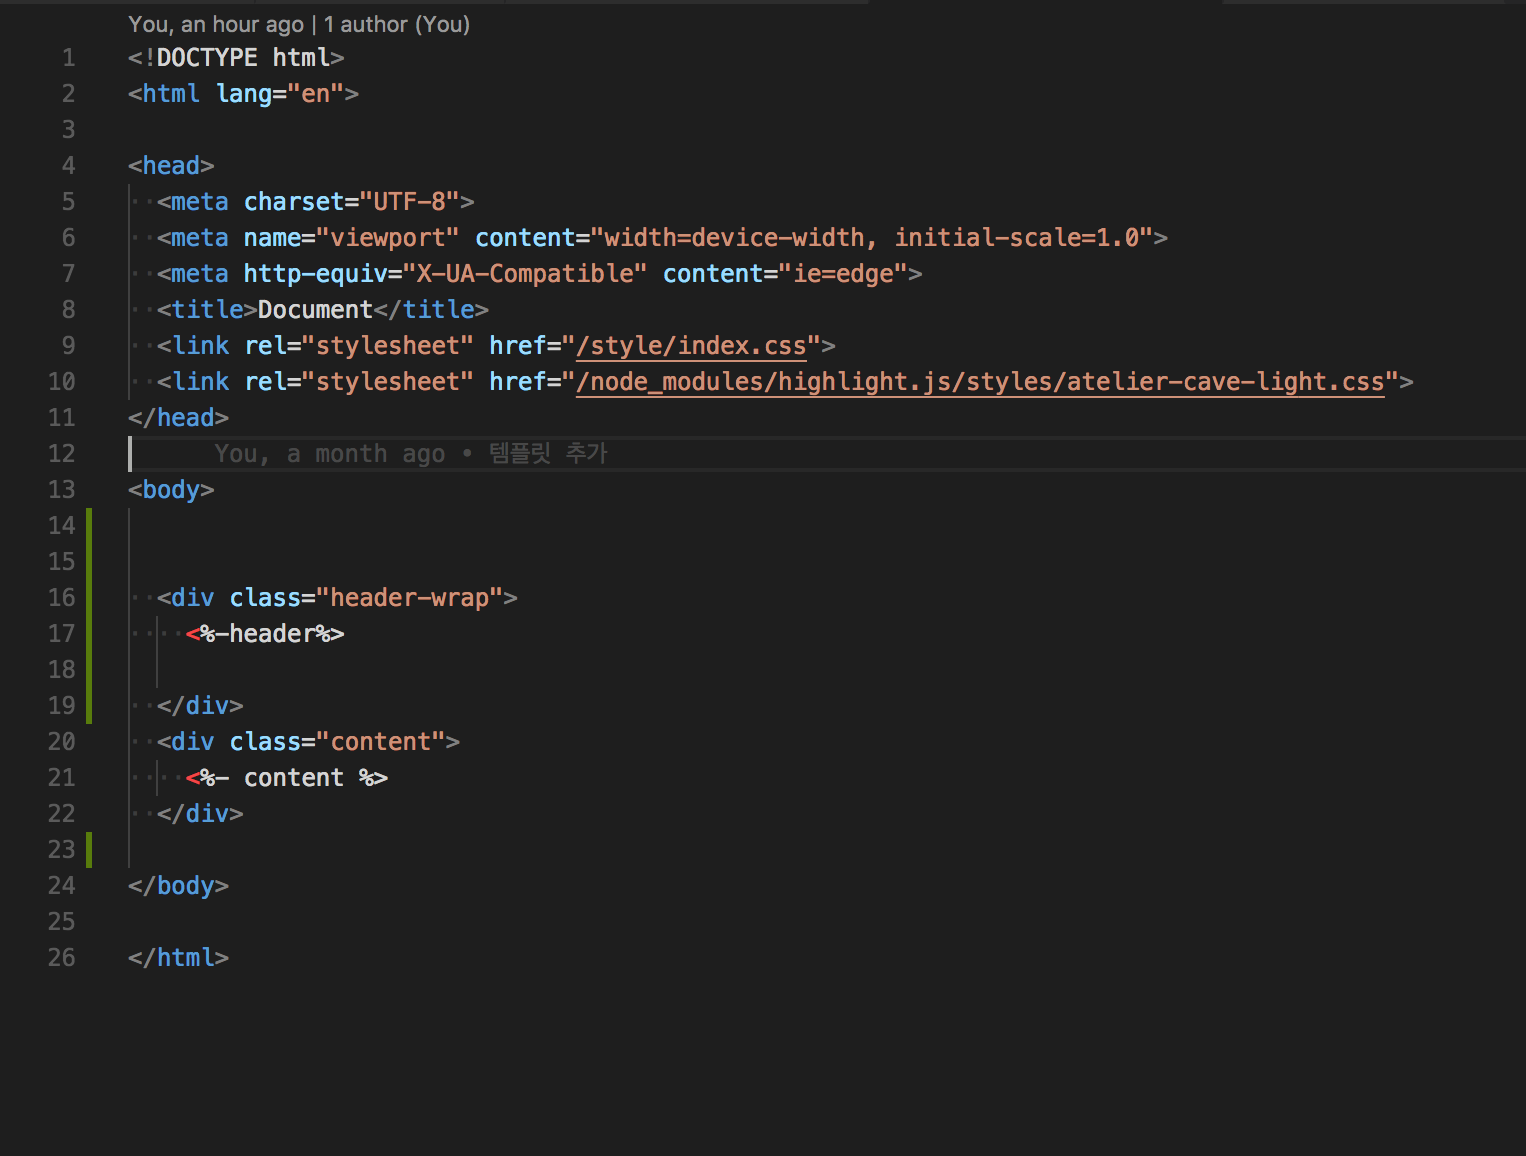
그리고 값이 채워진 헤더를 layoutHtmlFormat 에 넣어줍니다. layoutHtmlFormat 을 렌더해주는 부분에 header 값을 추가로 렌더해주세요.
const articleHtml = ejs.render(layoutHtmlFormat, {
  content: articleContent,
  header
});
const listHtml = ejs.render(layoutHtmlFormat, {
  content: listContent,
  header
});
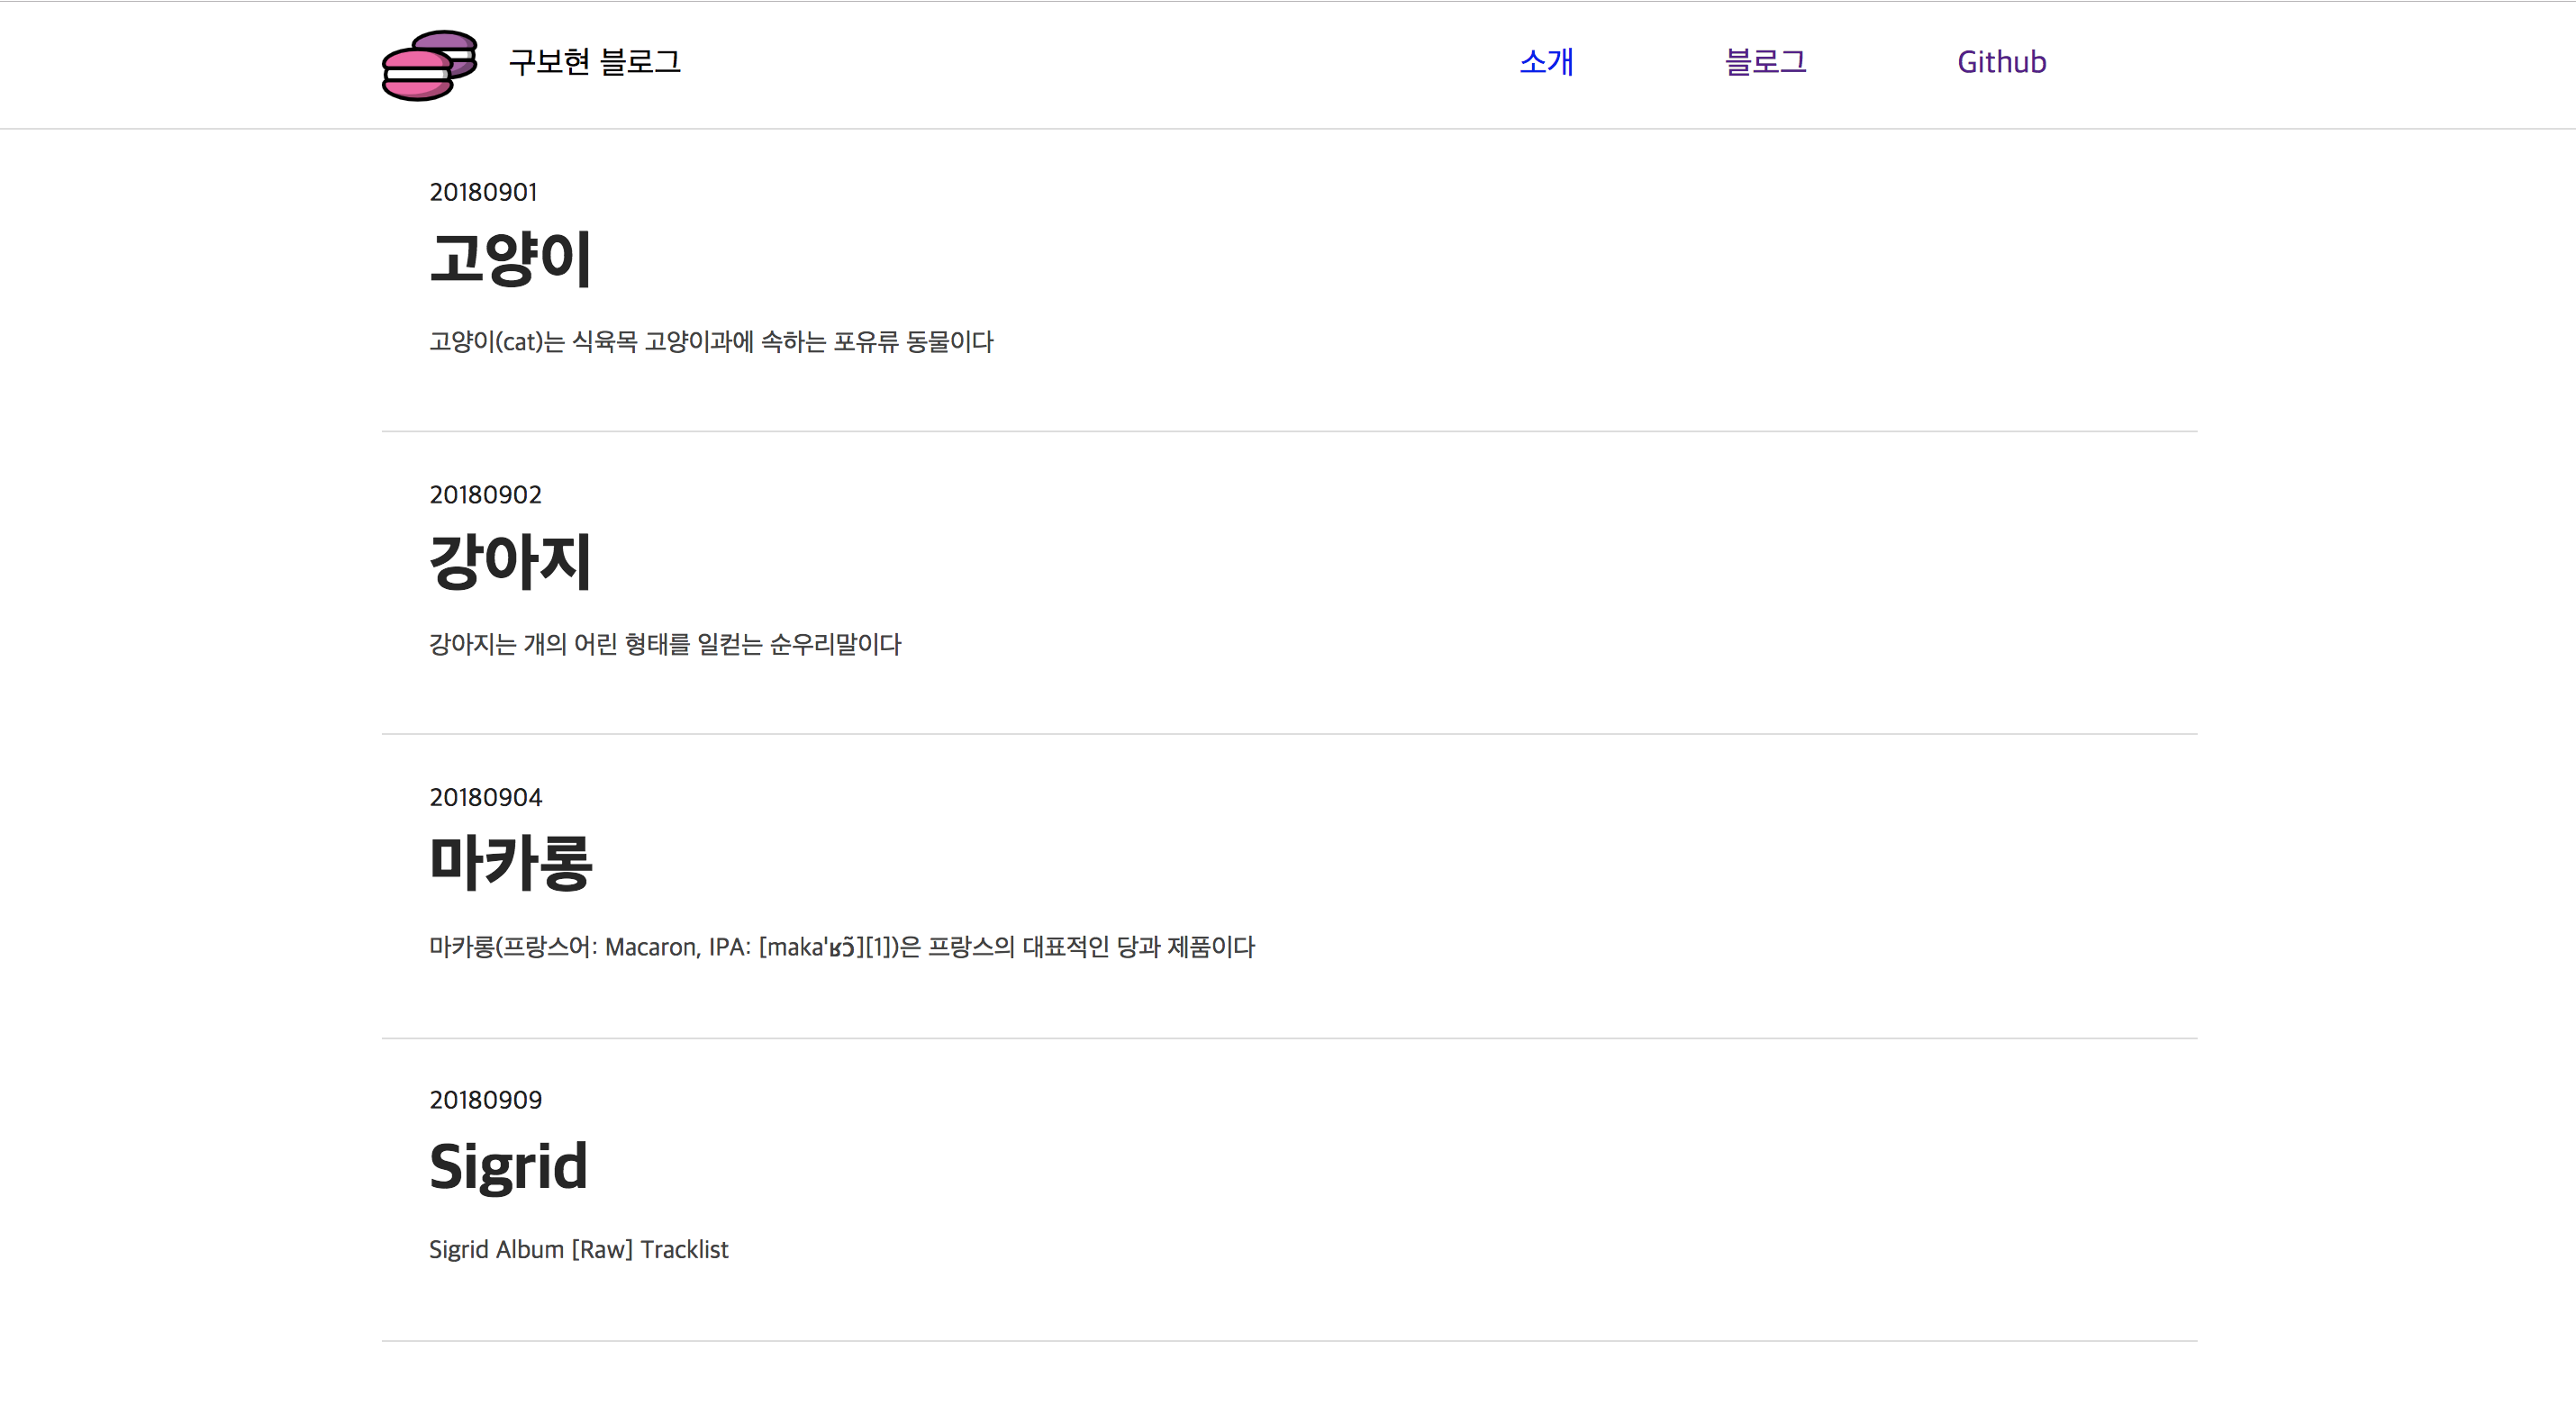
그리고 확인을 해봅시다. 헤더 부분이 잘 추가되었죠? 그런데 디자인을 조금 수정해야 할 것 같습니다.
스타일링 하기
저는 이런식으로 헤더 스타일링을 하였습니다.
$content-width: 70%;
$header-height: 4rem;

.header-wrap {
  border-bottom: 1px solid $grey-lighter;
  height: $header-height;
  width: 100%;
  line-height: $header-height;
}

.header {
  width: $content-width;
  margin: 0 auto;
  display: flex;
  justify-content: space-between;
  &__item {
    width: 50%;
    .logo-wrap {
      display: flex;
      a {
        padding-right: 1rem;
        margin-top: ($header-height - 3rem)/2;
        img {
          line-height: $header-height;
          width: 3rem;
        }
      }
    }
  }
  &__nav {
    width: 50%;
    ul {
      margin: 0;
      display: flex;
      justify-content: space-evenly;
      li {
        list-style-type: none;
        a {
          text-decoration: none;
        }
      }
    }
  }
}
그리고 컨텐츠의 width 도 수정하였습니다.
.content {
  width: $content-width;
  margin: 0 auto;
}
헤더를 추가 한 블로그가 완성 되었습니다!
소개 페이지 만들기
소개 글 받기
소개 페이지도 아티클 페이지를 만들었던 것과 같은 방식으로 만들 수 있습니다. 블로그 글을 작성했던 것처럼 블로그를 소개하는 글을 author.md 안에 작성할 수 있습니다.
아래와 같이 블로그 소개글을 작성해주세요.
+++
disqus = 'https://bohyeon.disqus.com/embed.js'
title = '구보현 블로그'
github = 'https://github.com/bohyeon-n'
logo='https://d29fhpw069ctt2.cloudfront.net/icon/image/85053/preview.svg'
+++
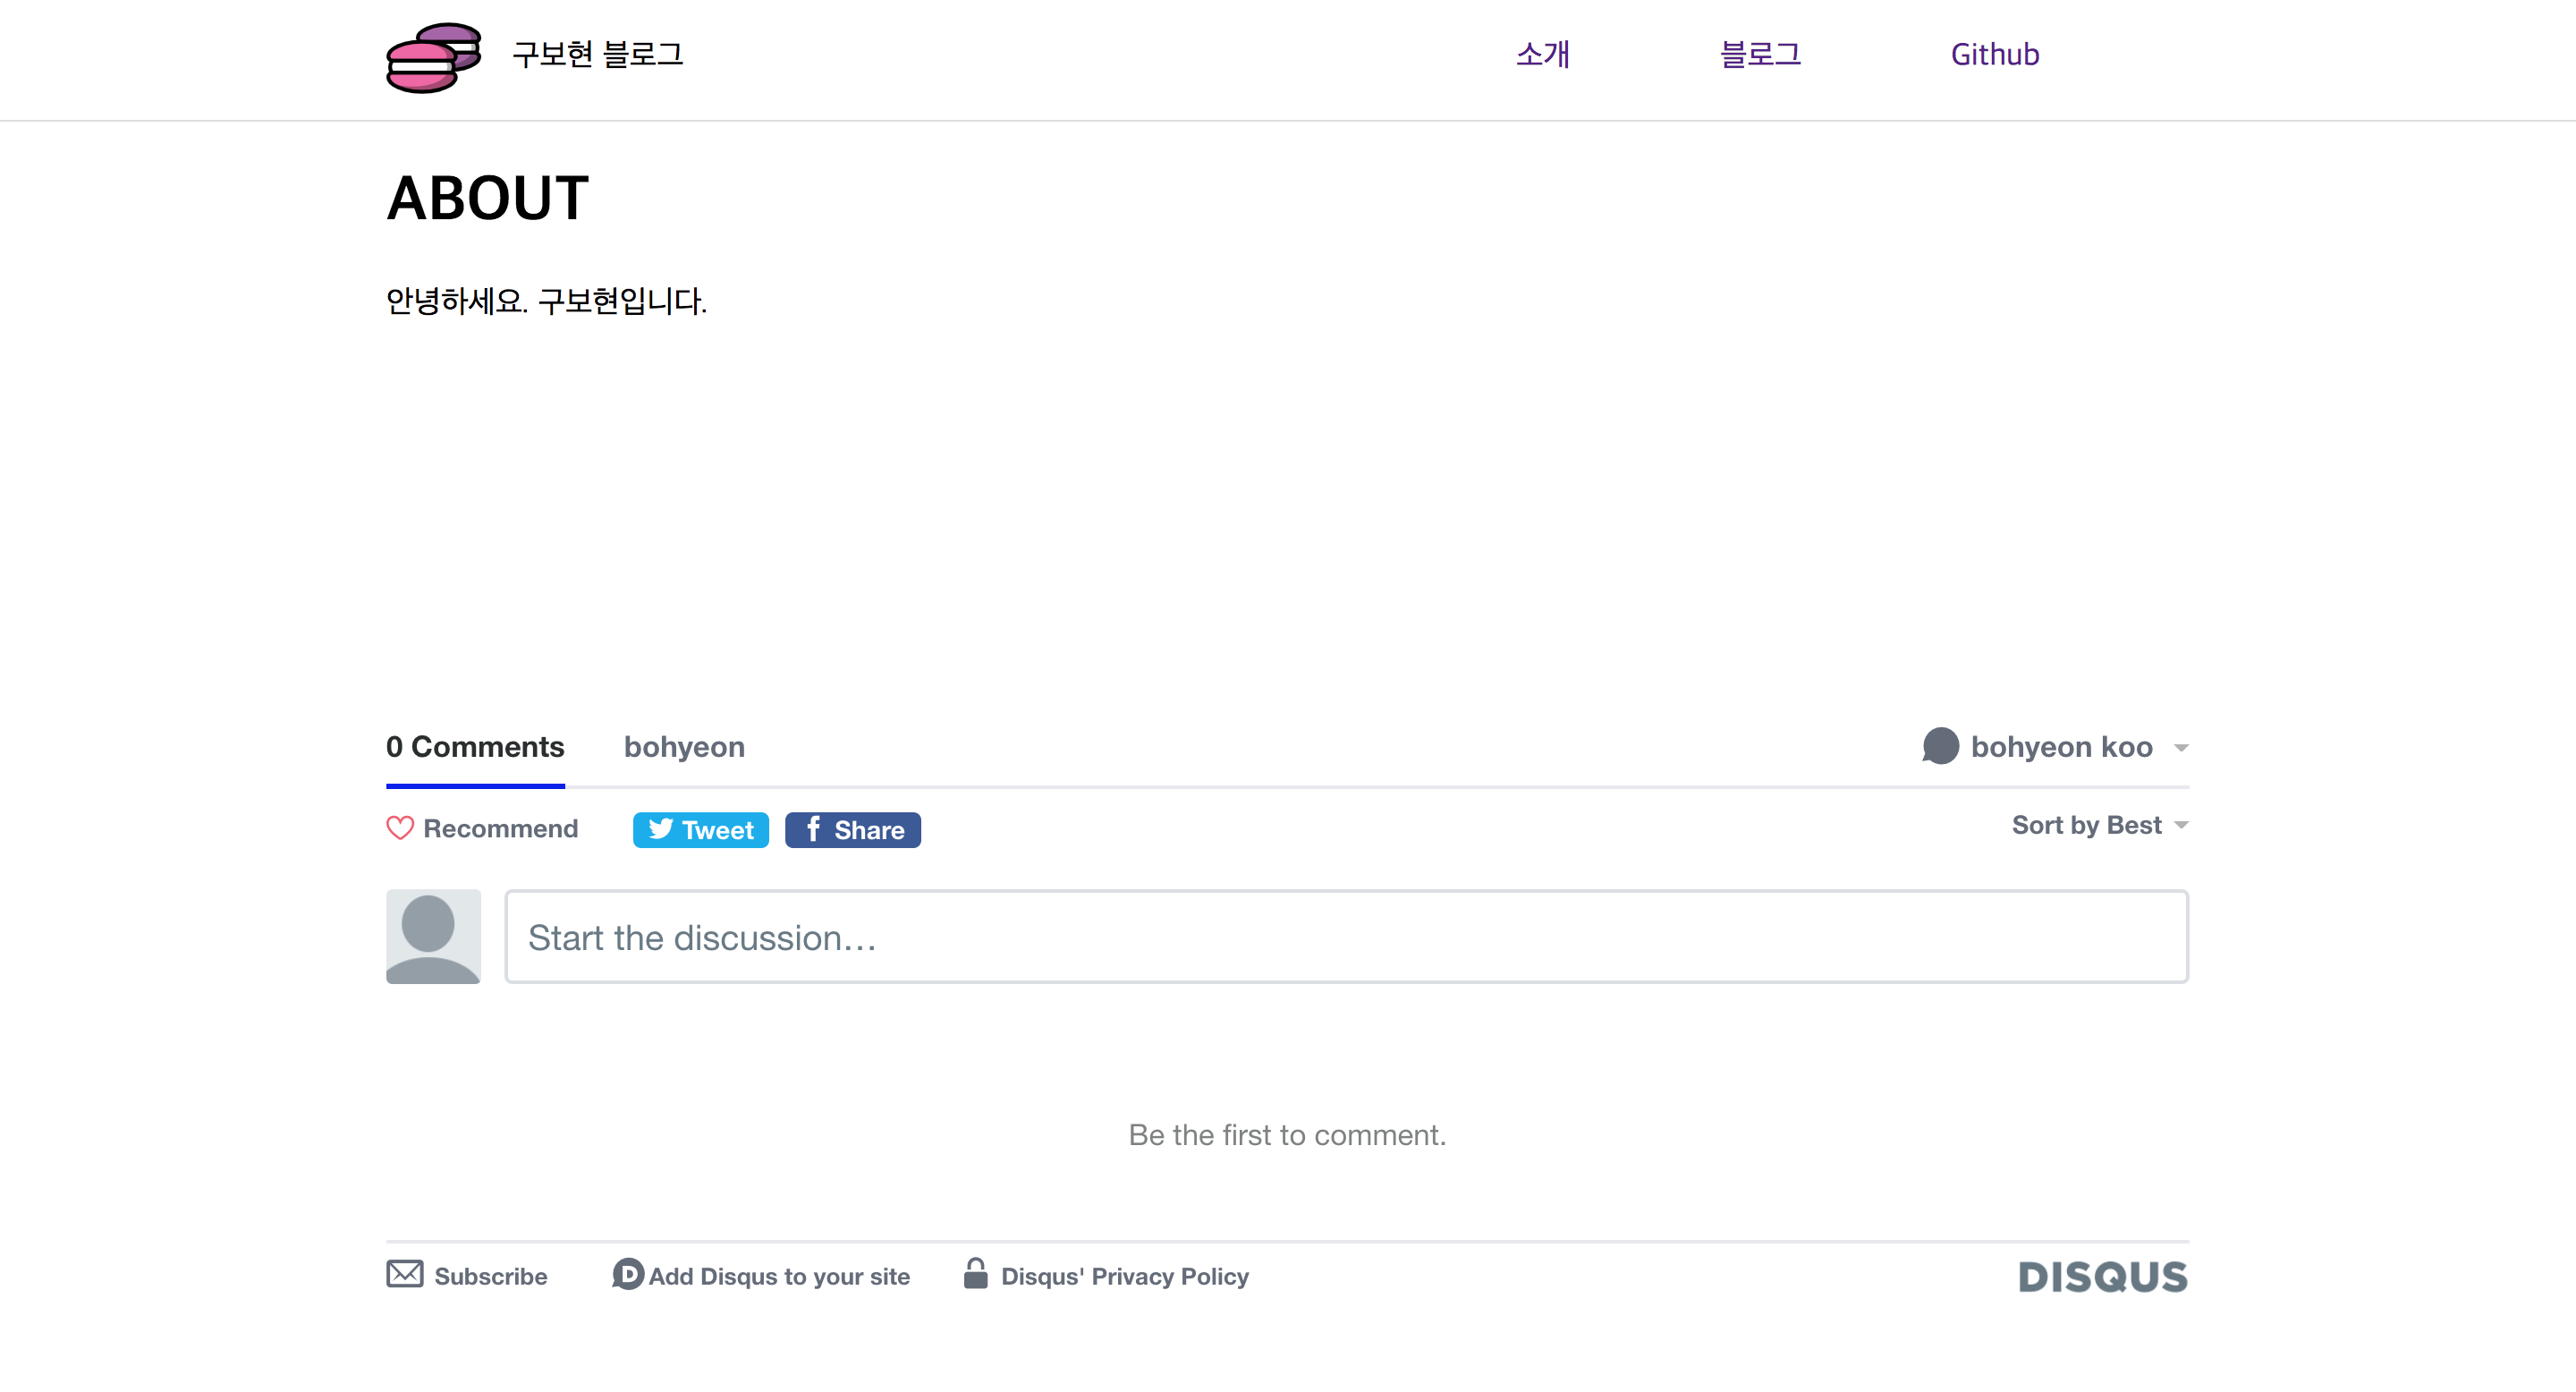
안녕하세요. 떙땡이 블로그입니다.
소개 페이지 렌더하기
기존에 만들어 놓았던 article_format.html 템플릿을 재사용하여 소개 페이지를 만들어 보겠습니다.
먼저 author.md 파일에 작성하였던 소개 글을 가져와야 합니다.
const authorBody = extractBody(authorFile);
그리고 article 템플릿에 authorBody 값을 넣어줍니다. 소개글에는 date 가 없으니 빈 문자열을 넣어주기로 합시다.
const author = ejs.render(articleHtmlFormat, {
  title: "ABOUT",
  date: "",
  body: authorBody,
  disqus: authorValue.disqus
});
레이아웃 템플릿을 사용하여 전체적인 페이지를 만든 후 소개 페이지 HTML 파일을 생성합니다.
const aboutHtml = ejs.render(layoutHtmlFormat, {
  content: author,
  header
});

fs.writeFileSync(`./deploy/about.html`, aboutHtml);
그리고 저는 보기 좋게 article__body 에 최소 높이를 주었습니다.
.article {
  &__body {
    min-height: 30vh;
  }
}
소개 페이지가 완성되었습니다!
마무리
이번 글을 마지막으로 블로그 생성기 만들기 작업이 끝났습니다!😺
블로그 생성기를 직접 만든다는 것이 어렵기도 하고 다른 좋은 프로그램도 많지만 사용하면서 직접 프로그램을 개선하는 재미가 있는 것 같습니다!
그럼 끝!
작성한 코드는 여기서 볼 수 있습니다!